I worked on so many different décor projects this week that I thought the most organized way to share them would be to break them out by category. This will likely be a pretty long post (sorry), and whether it be in one sitting or several, I hope it's interesting enough for you to get to the end. And even more, I hope something here will inspire you with ideas for your own mini projects!
Curtain Components
For the living room window, I had in my mind a gauzy sort of single curtain, pulled back to one side because of the stairs. It's always been a struggle trying to figure out how to hang curtains in a dollhouse, so I wanted to come up with an idea that I could use again and again in this and future projects. Using Tinkercad, I created hardware to hang a curtain rod and finials for the curtain rod ends. The curtain rod is a 3.18 mm K&S Metals brass rod, but you could use a 1/8" dowel, too. I painted all of the components black, then made the curtain panel from a scrap piece of gauzy Swiss dot fabric in my stash.
 |
Curtain Rod Support Rendering.
I can probably make them about half as wide in future projects. |
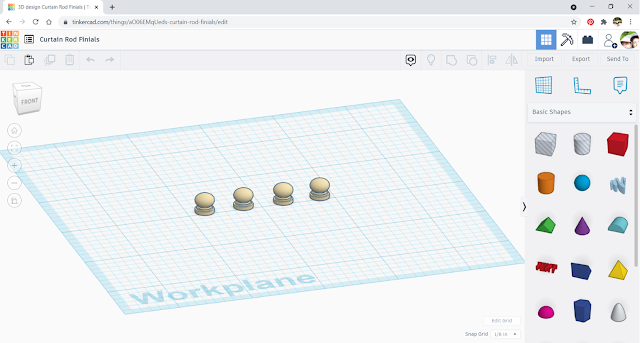 |
| Curtain Rod Finial Rendering |
 |
| The plate and holder get glued to the wall, then the rod sits in the hook's belly. |
 |
| The finials fit over the end of the curtain rod. |
 |
| Hardware painted black and curtain panel installed. |
Hanging Groupings
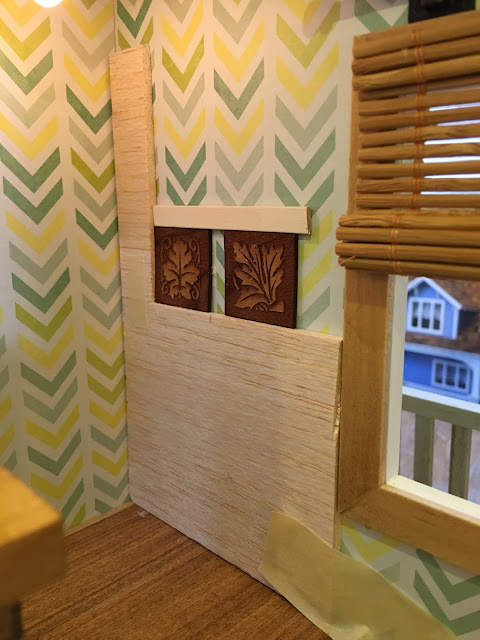
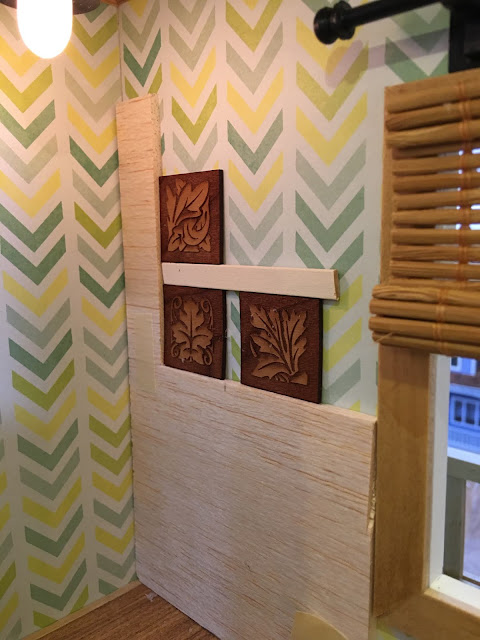
It's hard enough to hang mini décor straight, but what if you have a grouping and want them exactly the same level and distance apart? That was my dilemma with having a grouping of four plaques to hang. And because I was working at the very back corner of the dollhouse, and in the stairwell, I needed extra assurance. I made a jig that was the height off the floor that I wanted for the bottom plaques with an added side piece that would center the grouping in the wall space. Pictures are worth one thousand words, so here's what I did:
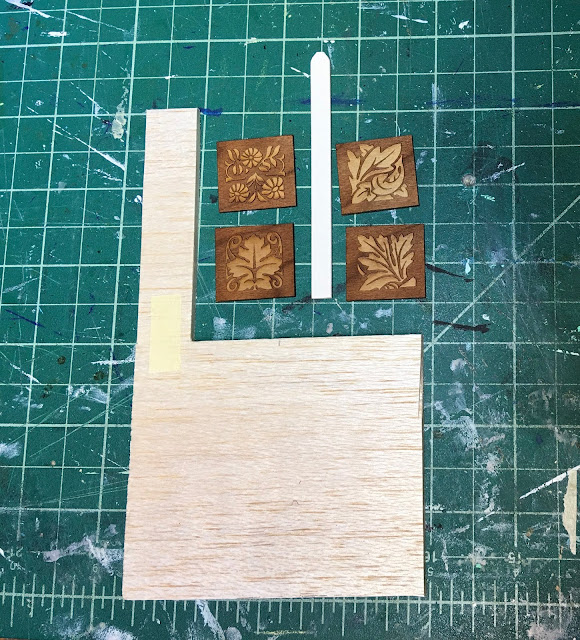 |
| Scrap wood jig is distance I wanted off the floor and centered in the wall space. |
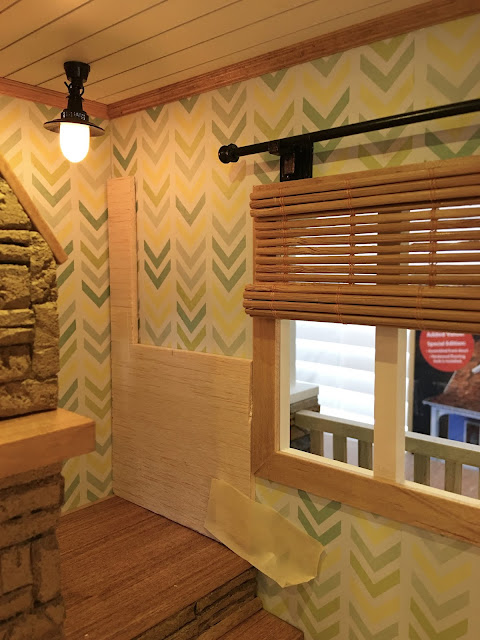 |
| Jig taped in place. |
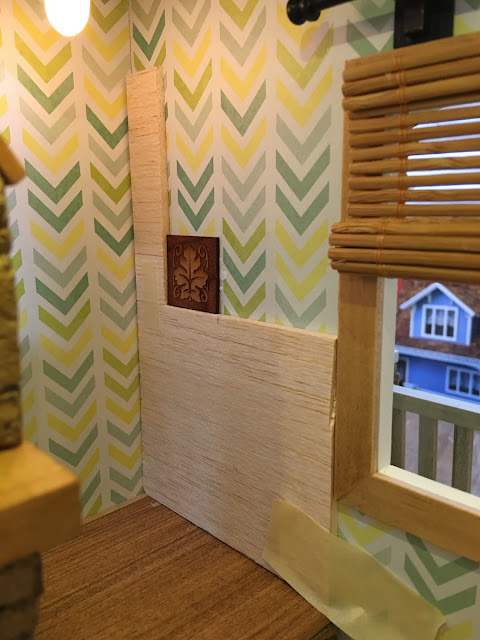 |
| First plaque added. |
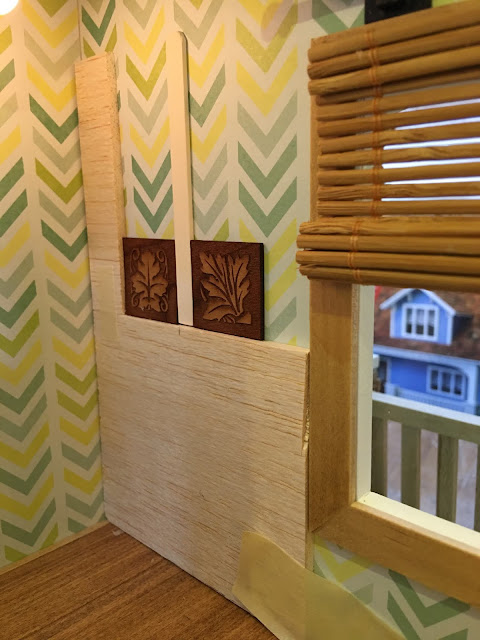 |
| First spacer piece added and then second plaque. |
 |
| Spacer piece added above bottom two plaques. |
 |
| Third plaque added. |
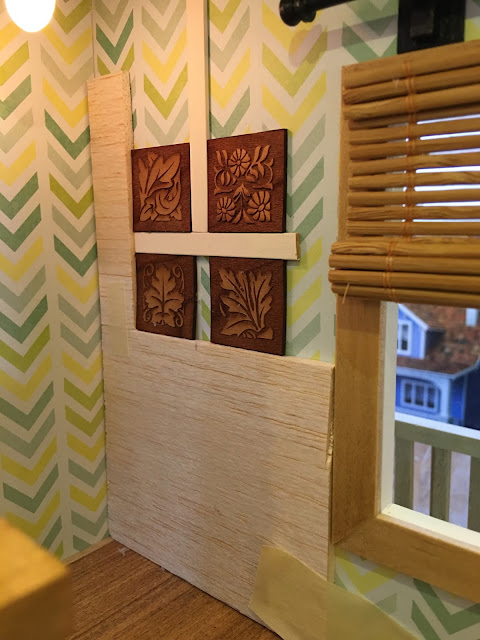 |
| Last spacer piece and plaque added. |
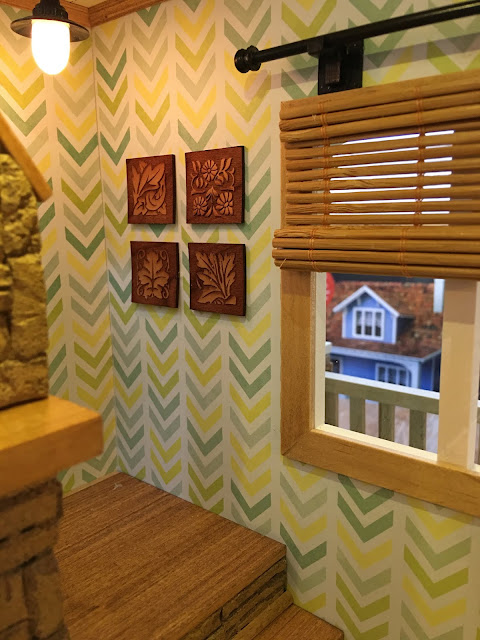 |
| Perfectly straight, level and even. |
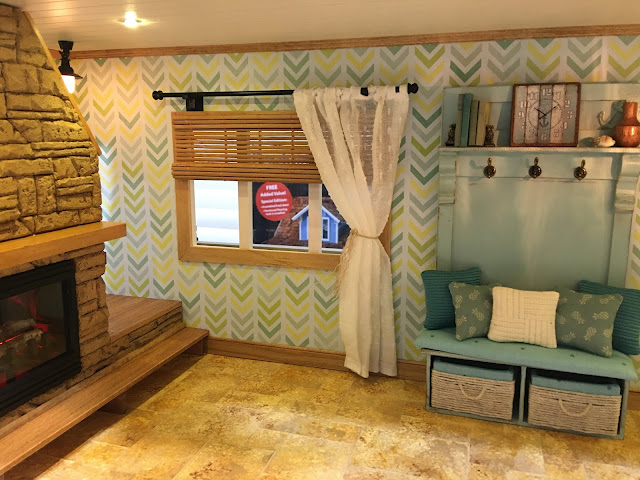
Starfish Plaques
I needed to make some interesting art for the walls. I had these neat starfish saved in my stash since I first began collecting beachy things for this project. I thought it would be cute to make some plaques with a beachy, wooden fence vibe. I cut 3/8" scrap pieces into 1-1/8" lengths, painted them alternating colors, applied ink pad to the edges, mounted the starfish then sprayed a matte sealer on them.
Key Holder
You may have noticed in the above photo the adorable little key holder. Once I'd hung the starfish plaques it seemed like that wall space needed something. In thinking about what would be there in a real sized house, it occurred to me that mini folks might need a place to hang their keys like we do. Once again I turned to Tinkercad and the 3D printer.
Porthole Mirror
For the wall above the fireplace mantle I made a porthole mirror, again utilizing Tinkercad and the 3D printer. I just looked at some examples of porthole mirrors online to get ideas for the details. I have a bunch of 2.5" Darice mirrors in my stash, so this seemed like a great way to use them. I painted the frame black, then used gilder's paste in copper to add some rusty looking highlights.
 |
| Porthole Mirror Rendering |
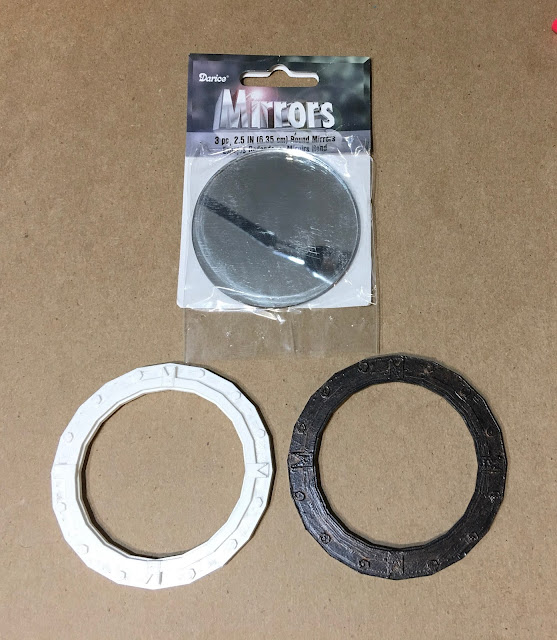 |
| Darice mirrors, white printed frame and then painted. |
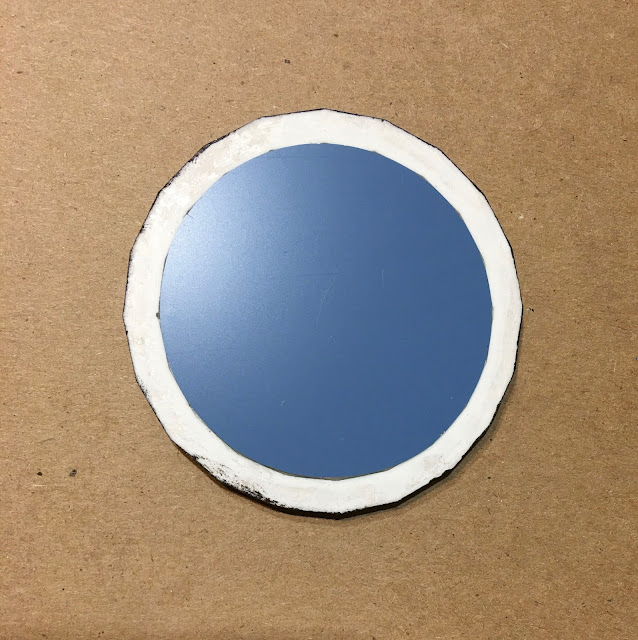 |
| Back of mirror. Mirror fits flush into frame. |
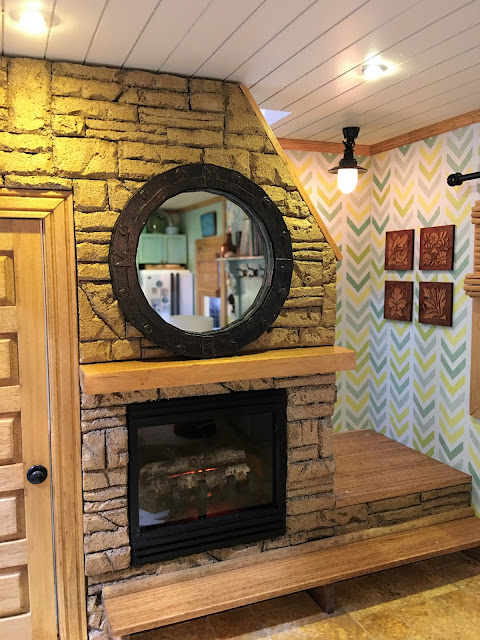 |
| Mirror above the fireplace. |
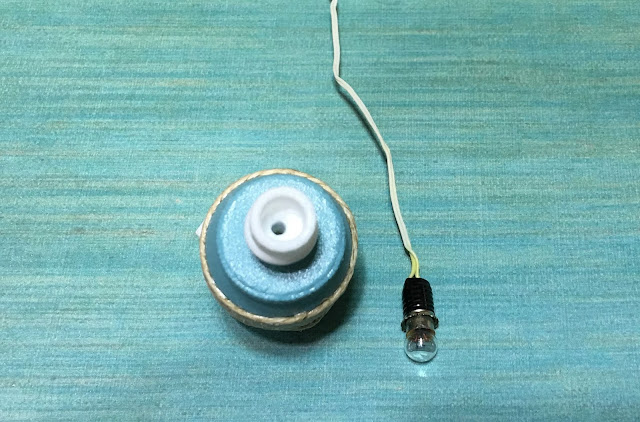
Lamp
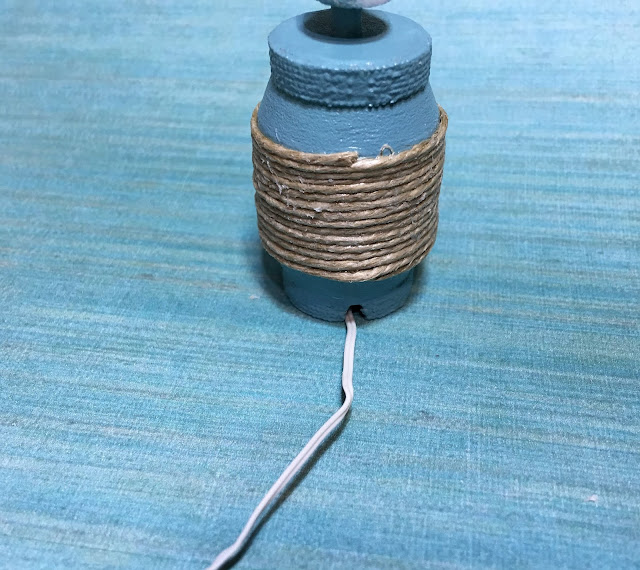
I needed to add supplemental lighting in the living room, so I thought a lamp would be nice on a table between the chair and sofa. I just happened to have one of my Shapeways Lamps on hand, the Twilight model, and I'd always wanted to try wrapping part of it with jute.
 |
| Painted then wrapped in jute. |
 |
| It takes a regular dollhouse 12 volt bulb. |
 |
| The wire is threaded down through the lamp base. |
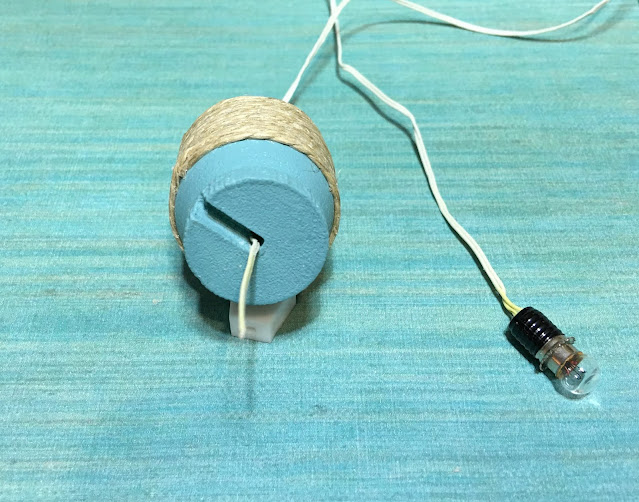 |
| And comes out the bottom into the recessed channel. |
 |
| The bulb sits in the holder. |
 |
| Exiting wire in the channel allows the lamp to sit flat. |
 |
| The shade sits on top of the bulb holder. |
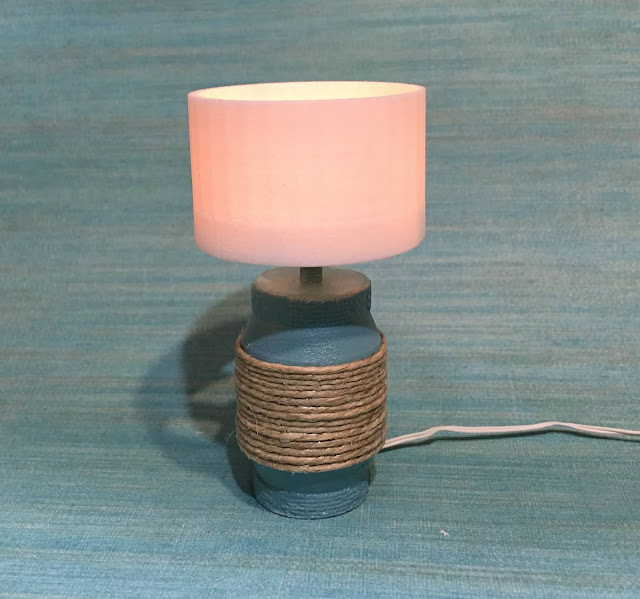 |
| The shade gives off a nice, soft glow. |
Lanterns
Since I first got the 3D printer, I'd often get lost in thoughts about designing and printing lanterns. Now was finally the right time to dedicate some serious time and effort to making them happen. Essentially, I spent and entire 16 hour day making different designs with different components and orientations to see what would work, what would fail, and how to correct the fails. Here's what worked:
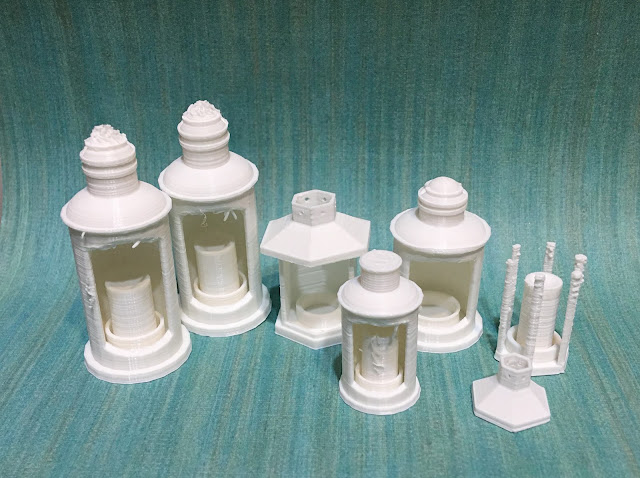 |
| Some were a little rougher than others, but they sanded up pretty well. |
 |
| I made "candles" too, so I could string candleflame bulbs in some of them. |
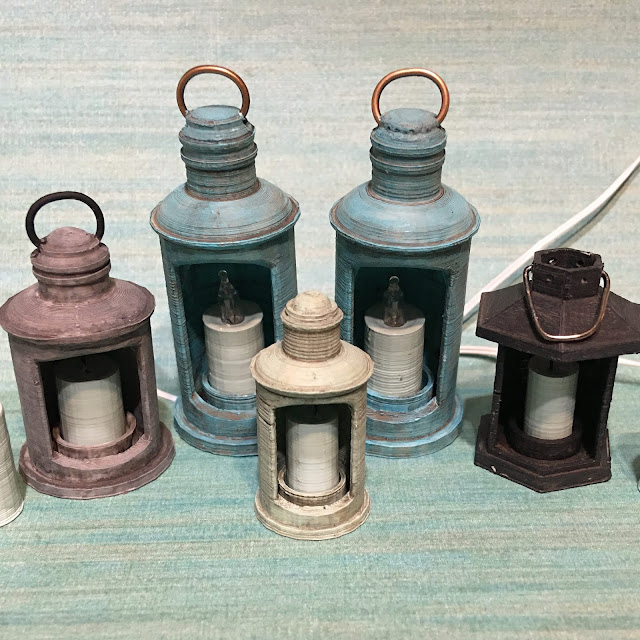 |
| The PLA paints up and distresses really well! |
I'm pretty sure the largest nautical lanterns are going to go on either side of the bench. I need to drill holes in the floor to run the wires under the house and hook them up to the power. That is a big undertaking at this point, so I am procrastinating, likely until after all the holidays are finished. Hopefully, the light from the candles will add some nice ambiance to the back of the room.
Coffee and End Table
If only I could (or would) learn how to make real life furniture, my real life house could be so much prettier! But while my ideas are good, lumber and real power tools are a lot more to deal with than chipboard and the Cricut Maker. I found three beach house style coffee tables I liked on Amazon, then combined my favorite elements from each to make this table set.
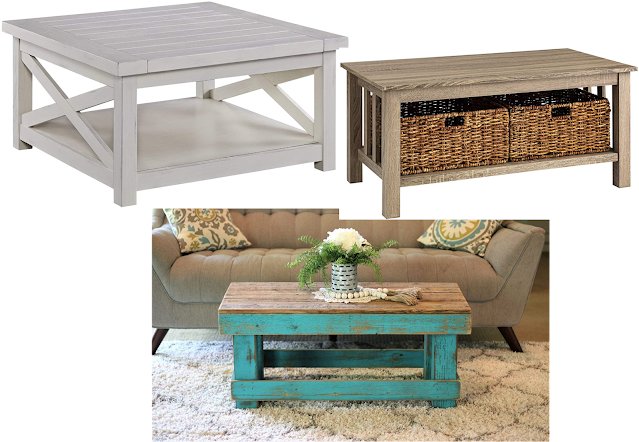 |
| Inspiration tables. |
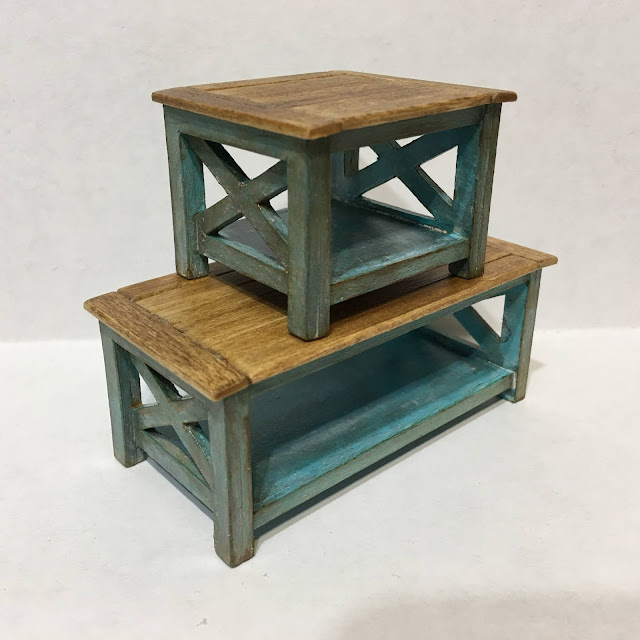 |
| I distressed them with several layers of paint and washes. |
Here they are with their accessories...
And in the living room with the furniture...
Rug
I found a sisal rug photo on Amazon, then printed it onto regular paper to test the size out in the living room. I settled on 7" x 7", printed it on fabric, and decided against fringe. I love how it incorporates so many of the project's colors!
I made a few other tiny accessories until I ran out of steam.
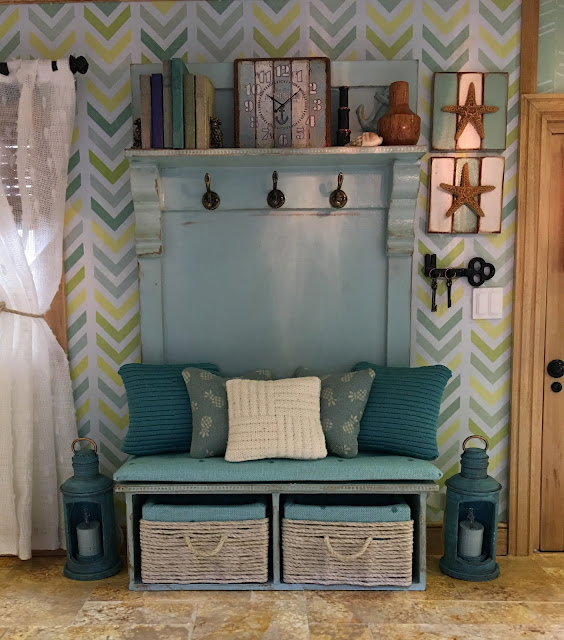
These beach totes and hat give a little lived in look to the hall tree...
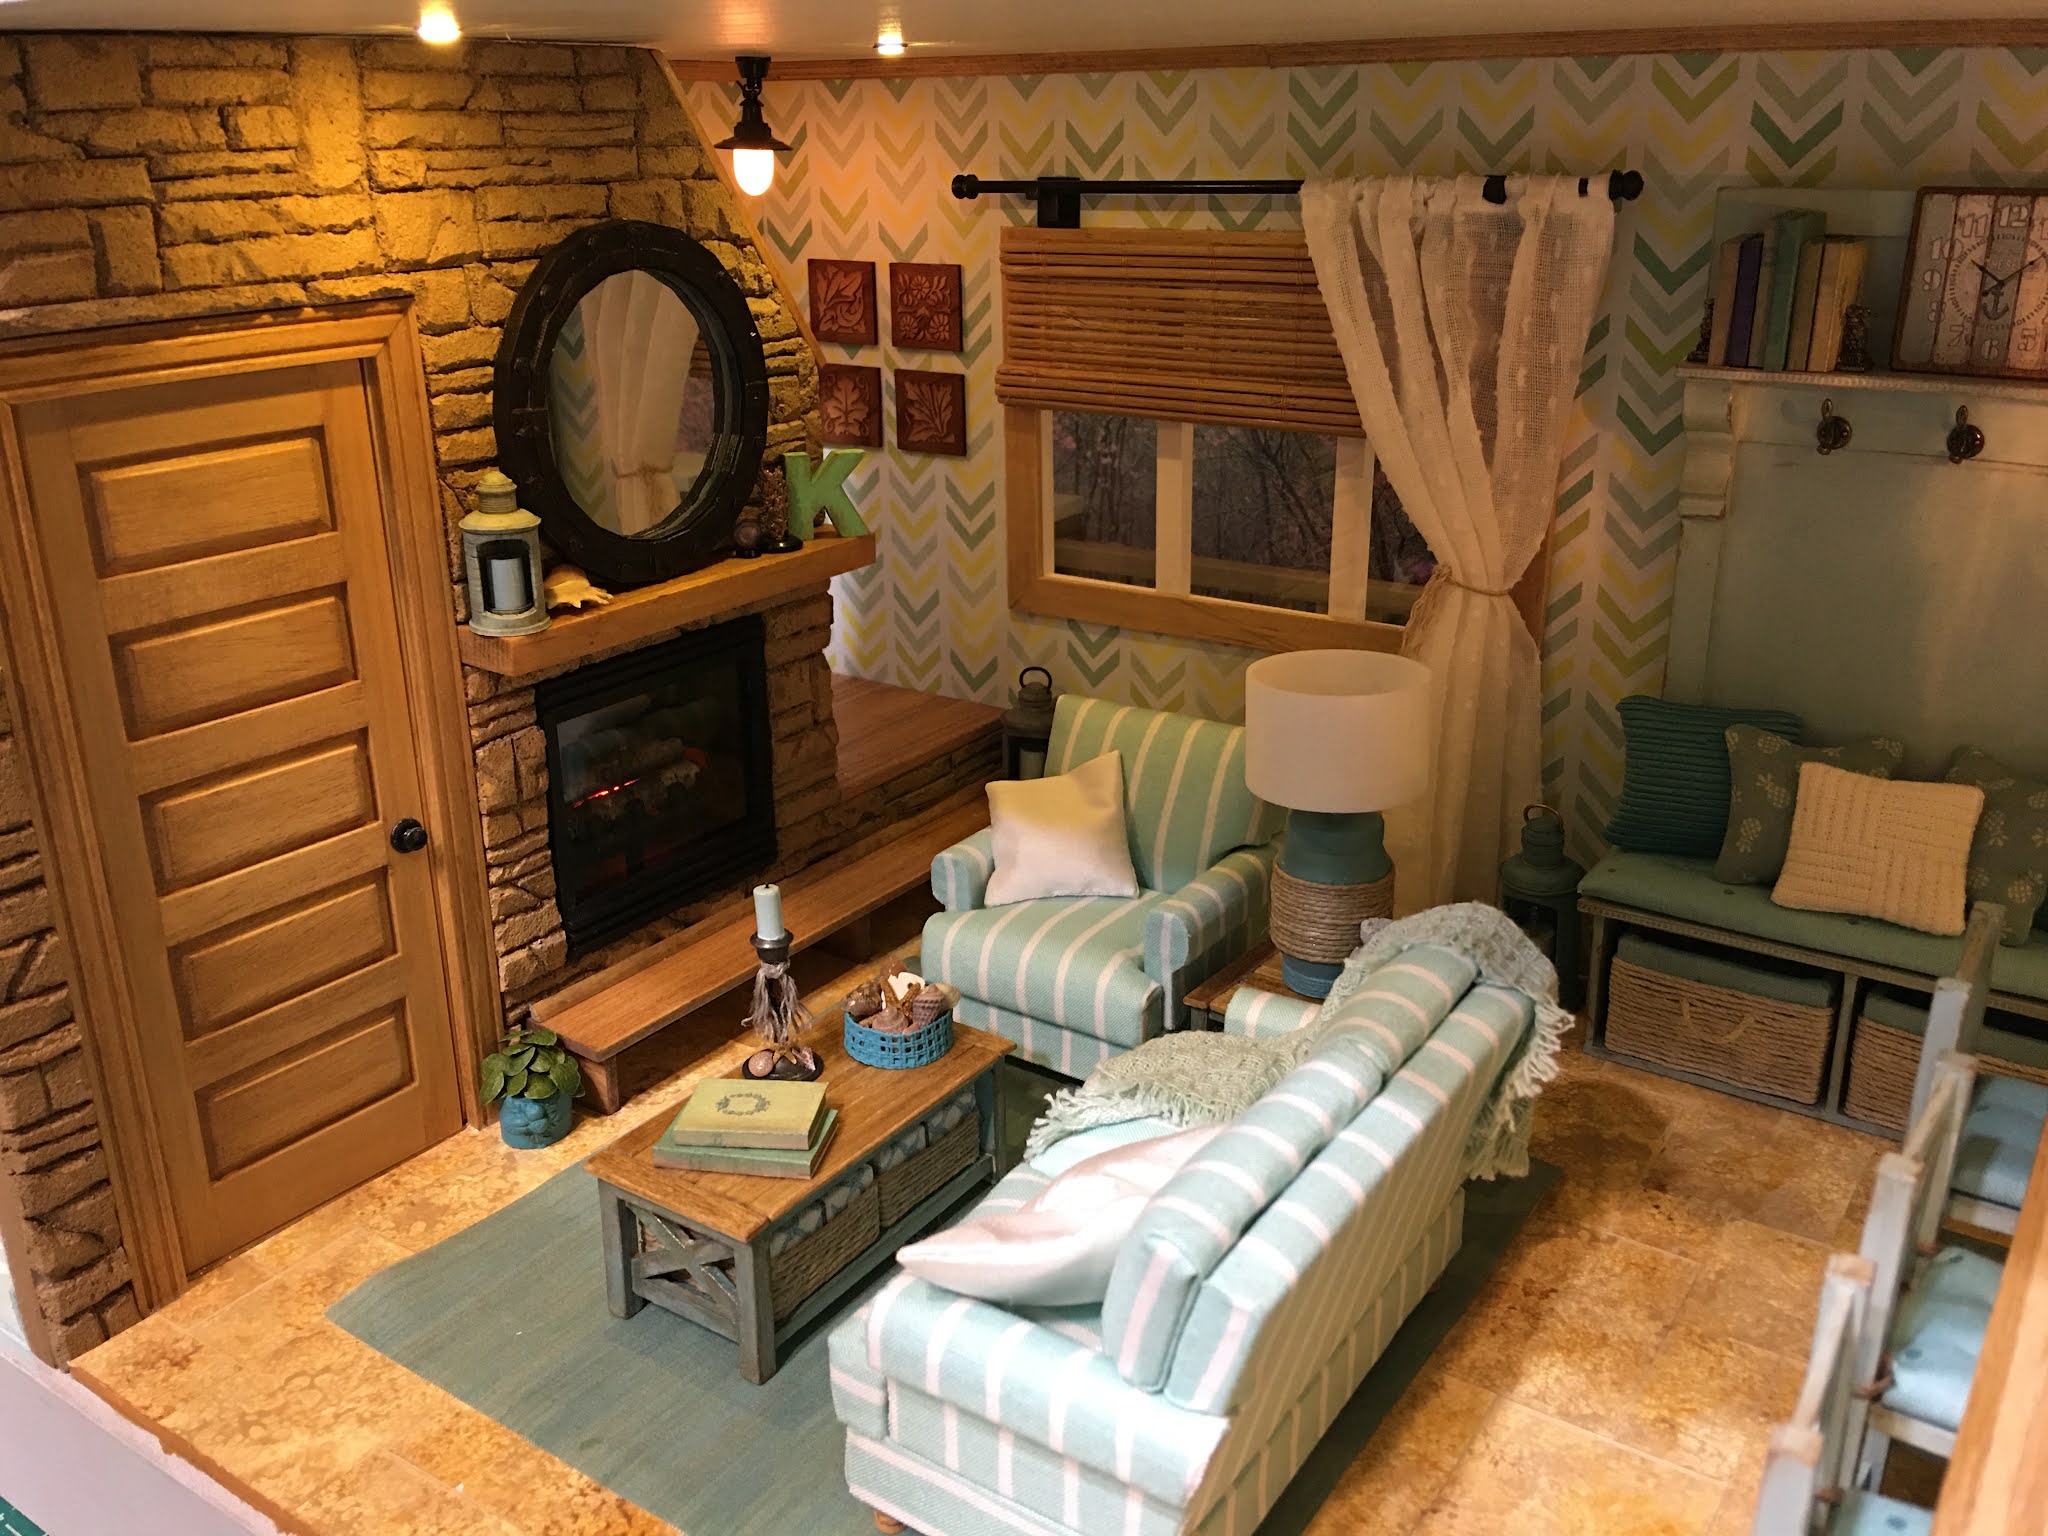
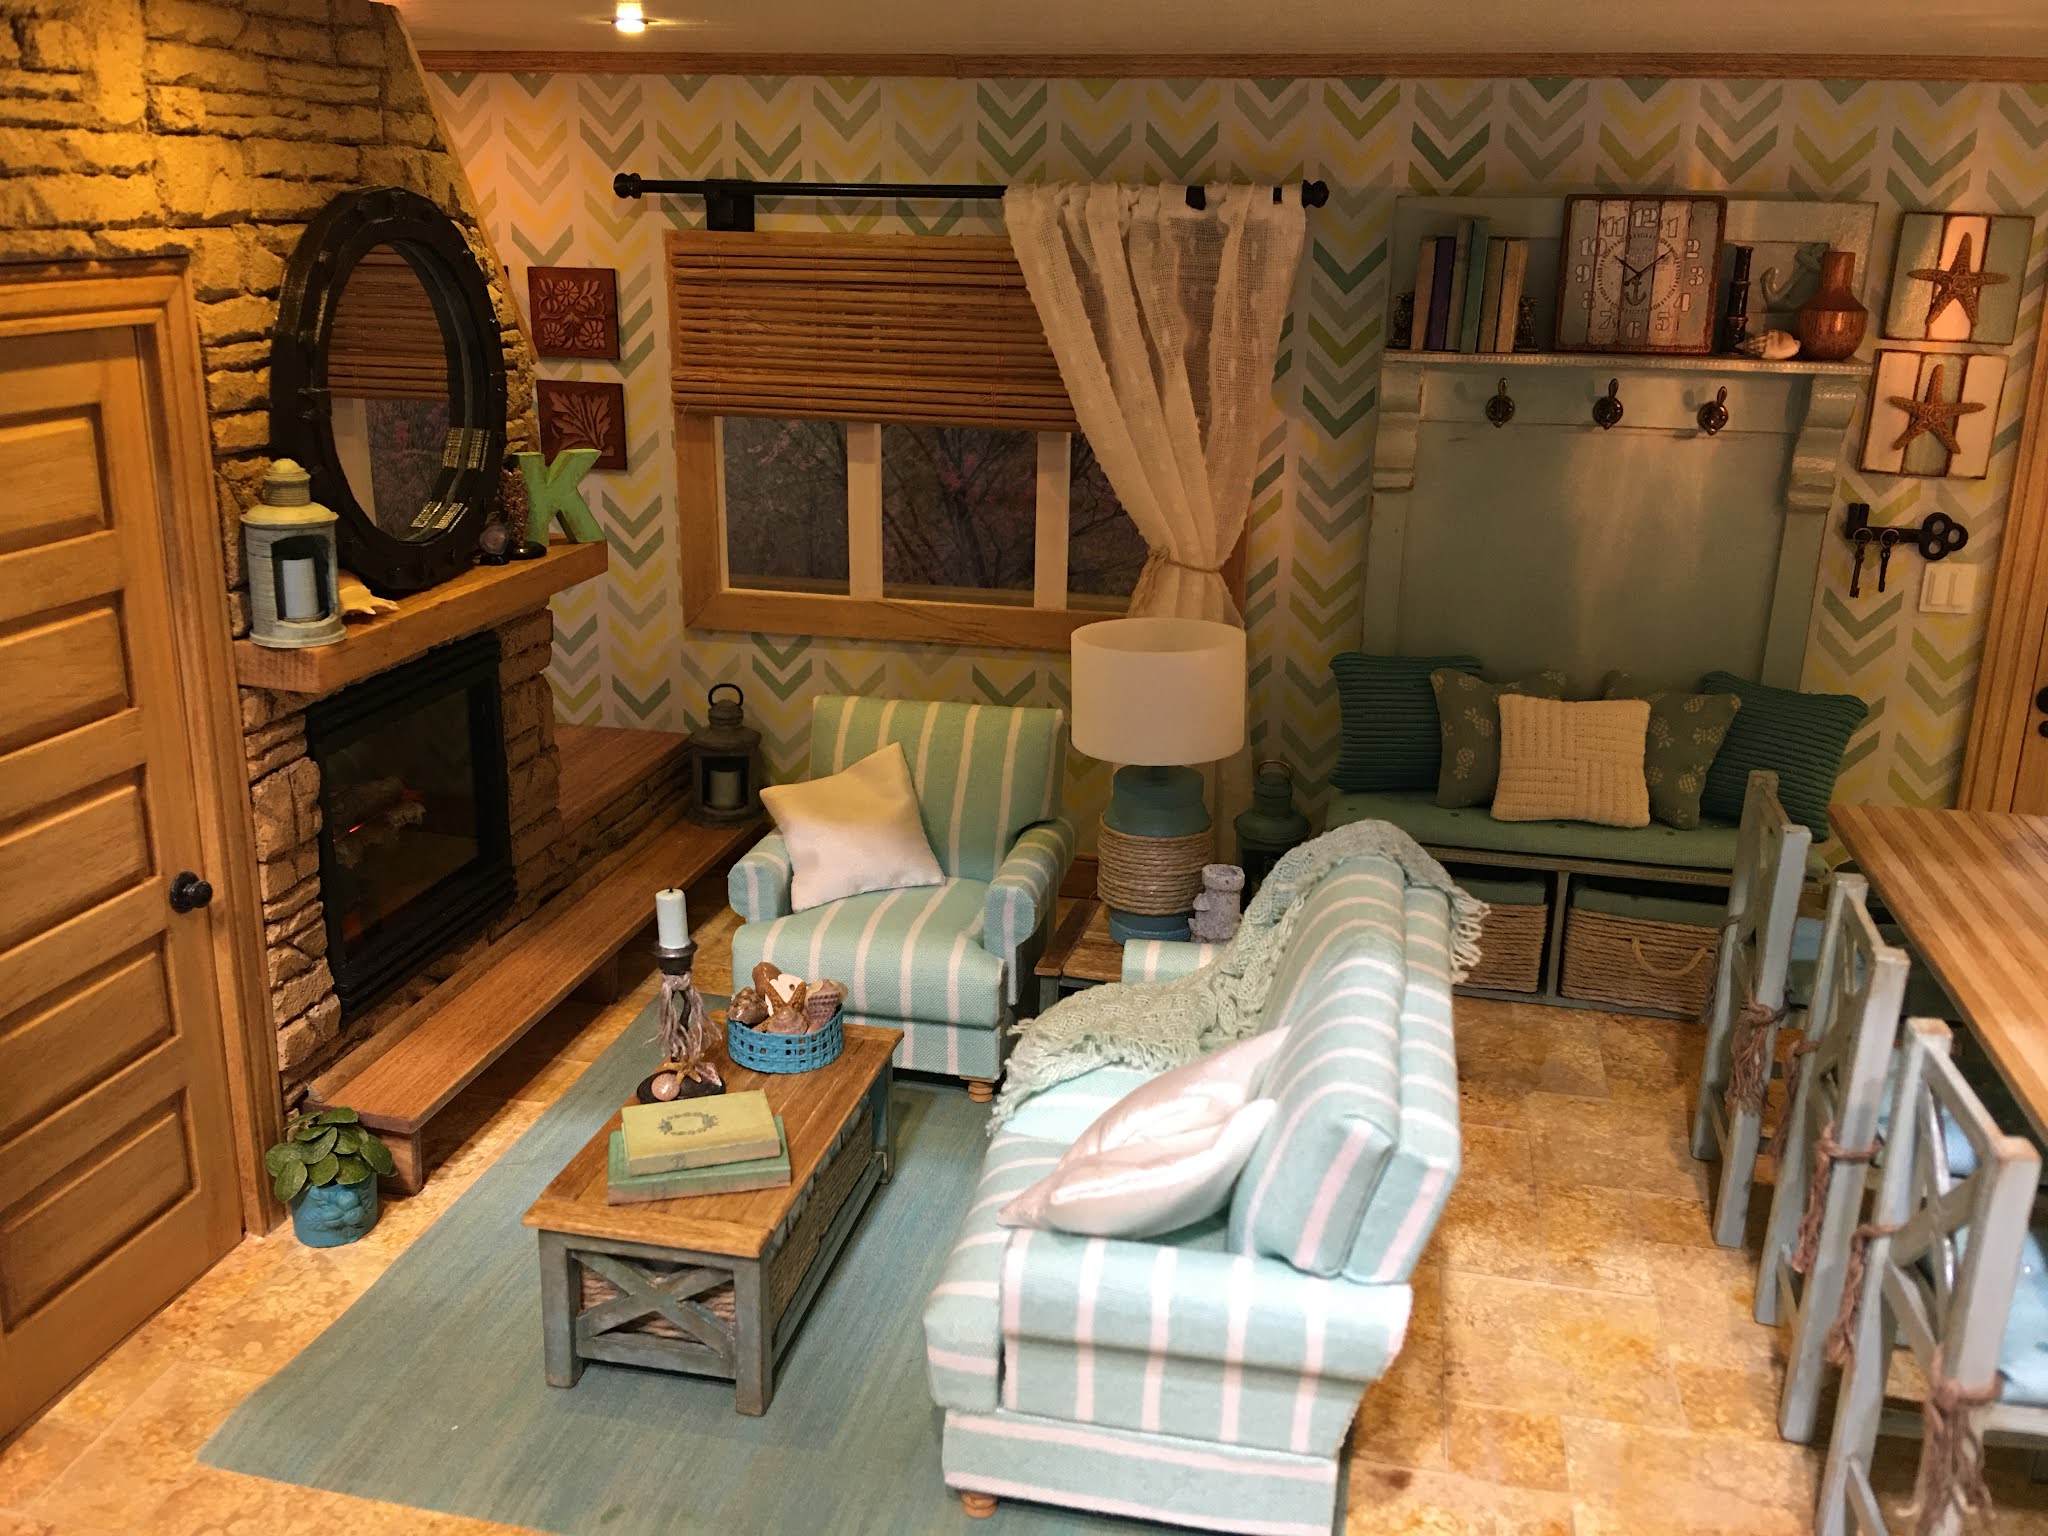
And a few more angles to give a better perspective of the space...
I just love the way this first floor came together! I do still have the powder room to do, but that shouldn't take too long since it's really tiny.
I think this is going to be a good stopping point for me until after the holidays. After so much separation from family because of the pandemic, we have all decided that Christmas Is On this year! Everyone who lives relatively close by is coming to our place, and my folks will be coming up from Arizona, too. There is so much to be done in order to make the lovely Christmas backdrop for creating precious memories! I may pop in from time to time if inspiration hits, and now that my self imposed one year hiatus from Facebook and Instagram have concluded, you might see me there more often.
Keep dreaming big things for your small spaces, my friends!
xo xo,
Jodi