You just finished your gorgeous embroidered stitch out…. It turned out BEAUTIFULLY! But it’s not on a shirt, cap, or sweatshirt. You still want everyone to enjoy this amazing stitch out. What to do?

We’re taking a step into the art gallery today, folks! Let’s discuss how to frame or display your embroidery while also talking about considerations to take and ideas for framing. The gallery is open, come on in!
Types of Machine Embroidery To Display
Machine embroidery is everywhere, but often we think of it as wearable art, not gallery art. We were hoping you could consider other ways to display and enjoy your embroidery stitch outs. Let’s discuss several types of machine embroidery to be displayed:
- Flat embroidery: the most common kind. It seems like all embroidery is flat, right? Well, it isn’t! Whether 2D (flat) or 3D (puffed for structured), it starts flat and then is shaped from there.
- Puffed embroidery: includes puff stuff, 3d puffy foam embroidery, quilting, trapunto, and more.
- Lace embroidery: lace collars, inserts in shirts, handkerchief edges, or napkins, but also lace textile pieces just for display
- 3D embroidery (In the hoop projects): ornaments, centerpieces, or 3D flower bouquets!
8 Ways to Display Machine Embroidery
There are many ways to display your embroidery, but first, you must decide where to display it. Will it be on a wall? In the sun? Near curious fingers?
Look at your space and think about how it would look and if that is the best place to display it. One way to imagine the area is to take a photo of the space and overlay a picture of your embroidery. Is it too large? Too small? It is better to invest a little more time imagining it in the space rather than cutting or altering the work only to find out you wanted it displayed differently elsewhere.
After finding the perfect space, it’s time to frame your stitch out. Here are some suggestions and tips for different kinds of framing.
Framing Machine Embroidery In An Embroidery Hoop
Many people love using an embroidery hoop as a quaint way to frame. It’s affordable and offers a lot of possibilities but also some nice perks. You can remove the embroidery to launder or alter, but you’ll want to be careful when re-hooping.
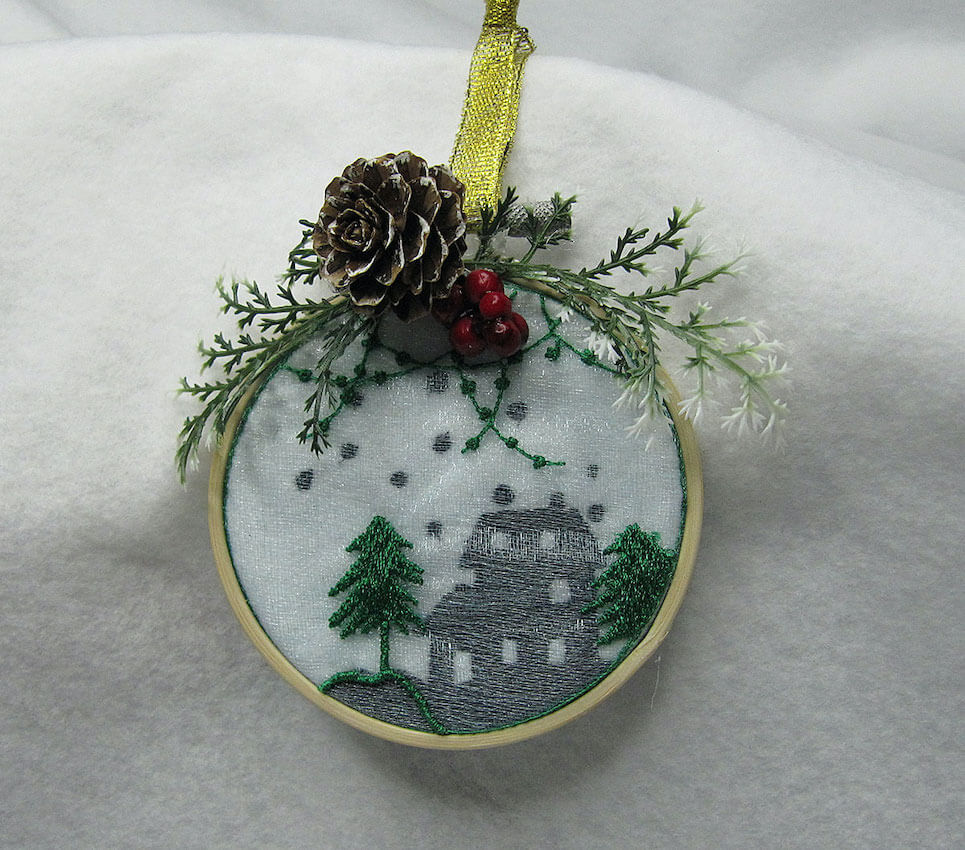
To frame in a bamboo (or another type of material) embroidery hoop, lay the embroidery face down on a flat surface and place the inside of the hoop (the part with no tension screw) on top. Either use a marking pencil or pins to create a circle 2 inches larger than the inside hoop and sew a basting stitch around the marked circle to create a “purse-string”.
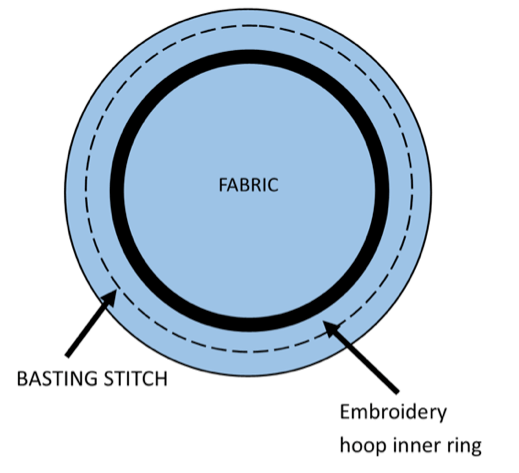
When you have rejoined the beginning of your circle, pull the purse string tight and tie it with a knot. The excess fabric will be gathered on the inside of the hoop circle and will not show. With the hoop right side up (embroidery facing you) place the outside hoop ring in place and tightened.
Framing Machine Embroidery In A Photo Frame
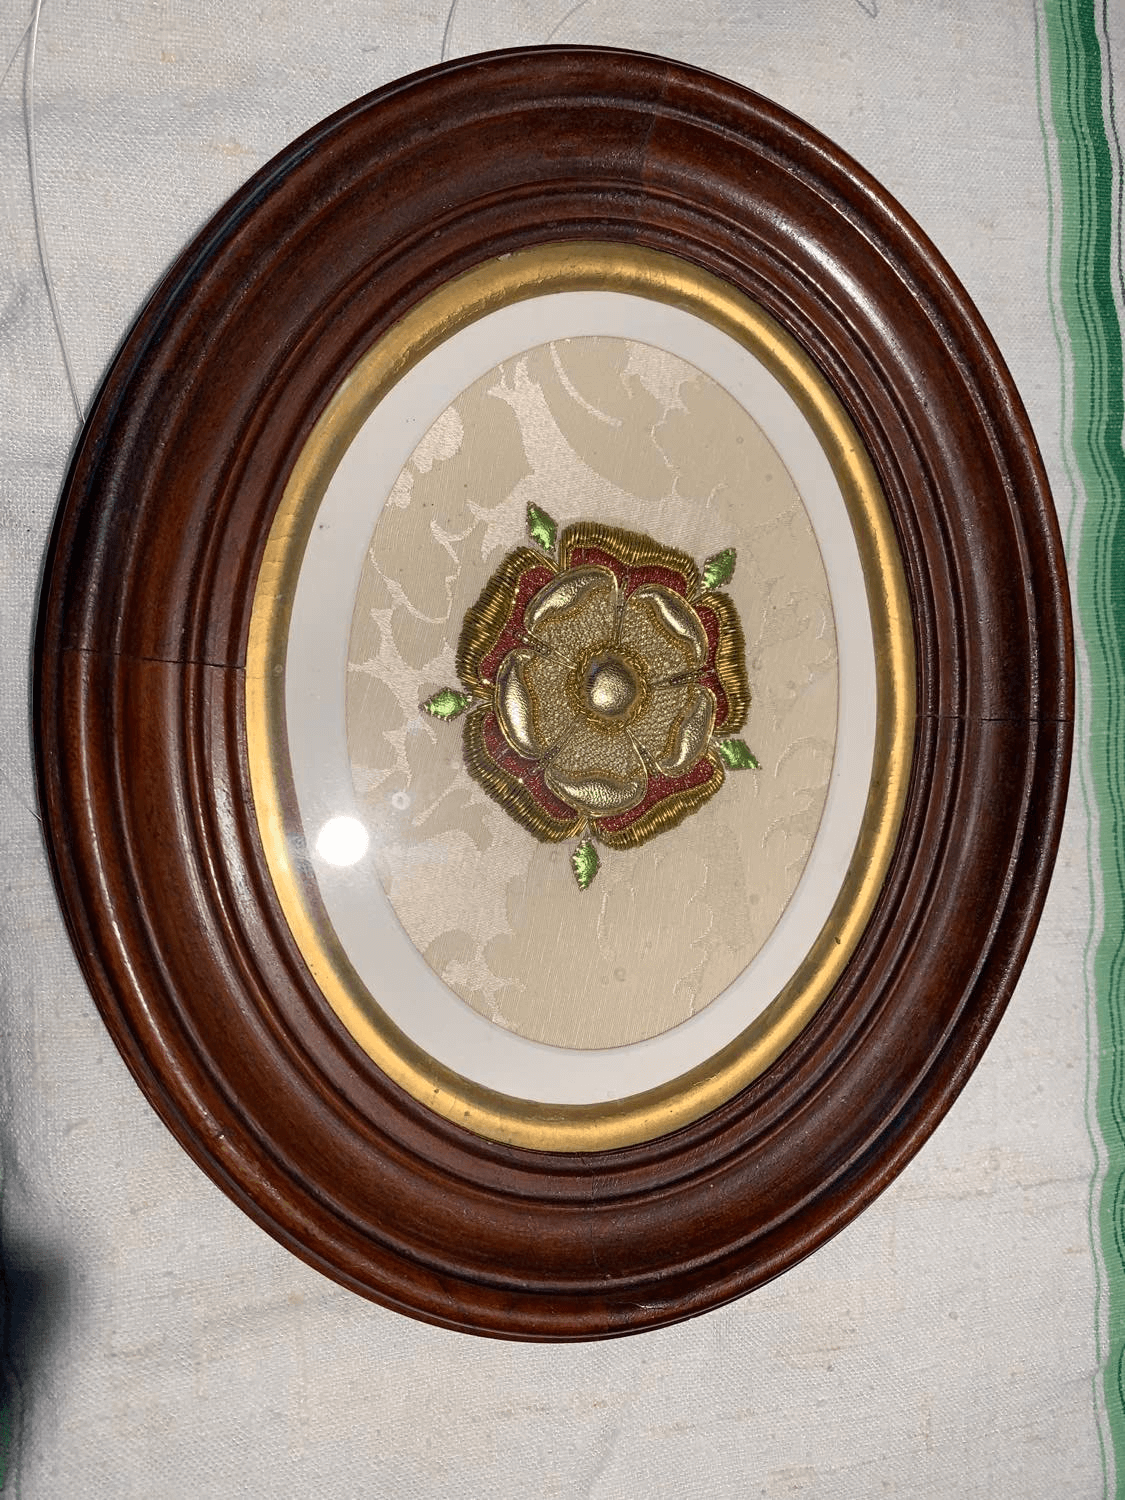
Framing your embroidery stitch out in a purchased photo frame is really easy! Purchase the frame you want and use the included backing to support your embroidery.
Please keep in mind that cardboard backings contain a lot of acid, and if you leave this in the frame for a long time, the acid can eventually damage the fabric and stitching. There are archival mats (acid-free) that are more expensive, but you may wish to invest.
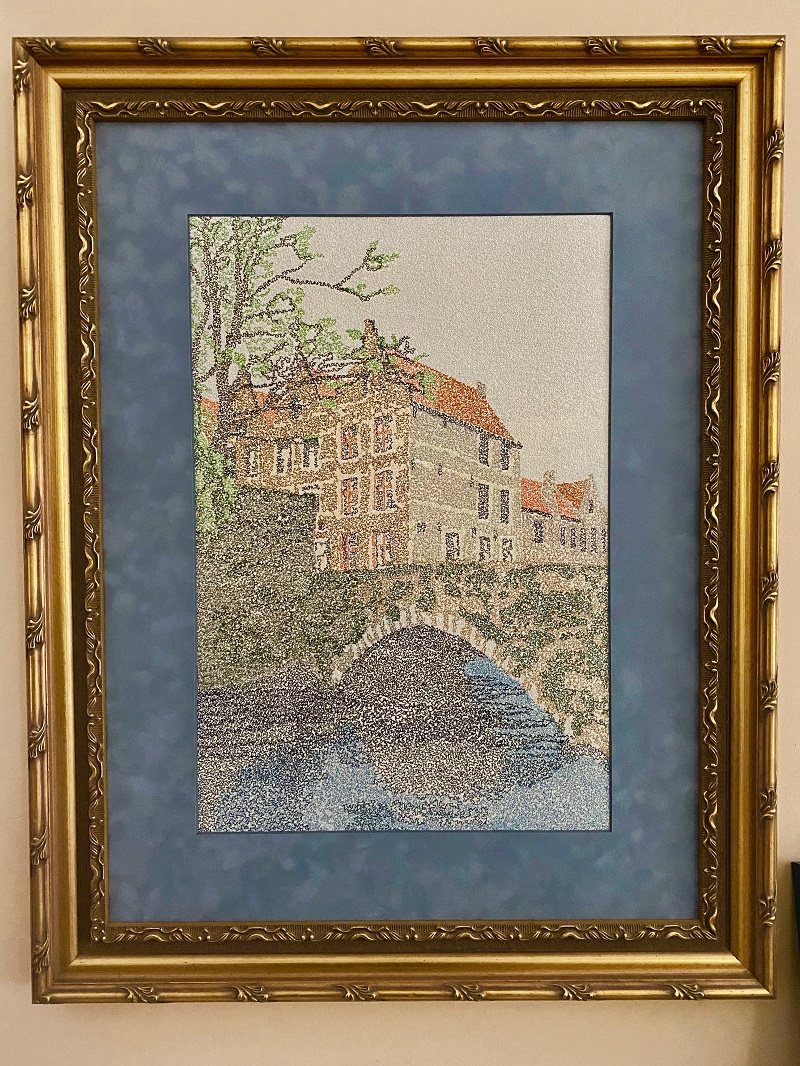
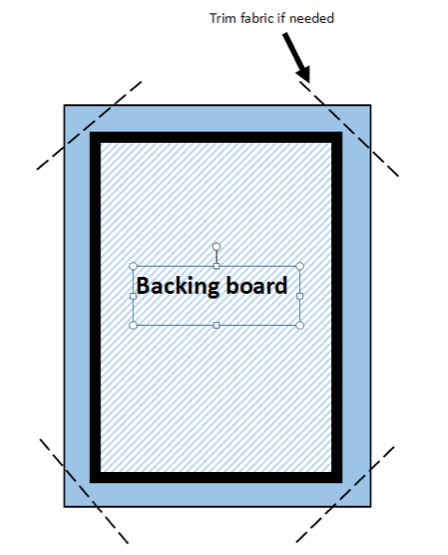
To frame, take the backing out of the frame and set it aside. Lay the embroidery face down on a flat surface and place the backing board on the embroidery. Using pins at each corner or a marking pencil, mark the four corners and check if the alignment is correct from the front.
Take into account the thickness of the fabric! You may need to use a slightly larger frame or trim the backing board to allow the frame to assemble correctly. You can also trim the corners (not too close!) to reduce the triangle of fabric in each corner and allow you to get the board in.
Now to secure it! Remove the board and give it a light spray of fabric tack or fabric adhesive spray (spray the board, not the fabric) and place it face down on the fabric, making sure to press evenly. Remember that this is a permanent framing choice, so consider your fabric, the design, and the material before you commit.
Want to learn more about adhesives in embroidery & how to properly use them without problems? Click here to learn how to master embroidery adhesives.
Place the board-backed embroidery in the frame and tape over the edges. Trim as much fabric away from the back as you can, but not less than 1 inch from the edge, and secure excess with tape. Place the embroidery in the frame against the glass and secure the back. Hang it up and enjoy!
How To Display Machine Embroidery Between Glass Panes
Floating or suspending embroidery between two glass panes is a distinctive way to display your art! All-glass frames are available online, but you can create your own with two pieces of glass (the same size), a roll of black or other colored tape, and a hanger. (By the way, this is an excellent way of displaying embroidered lace!)
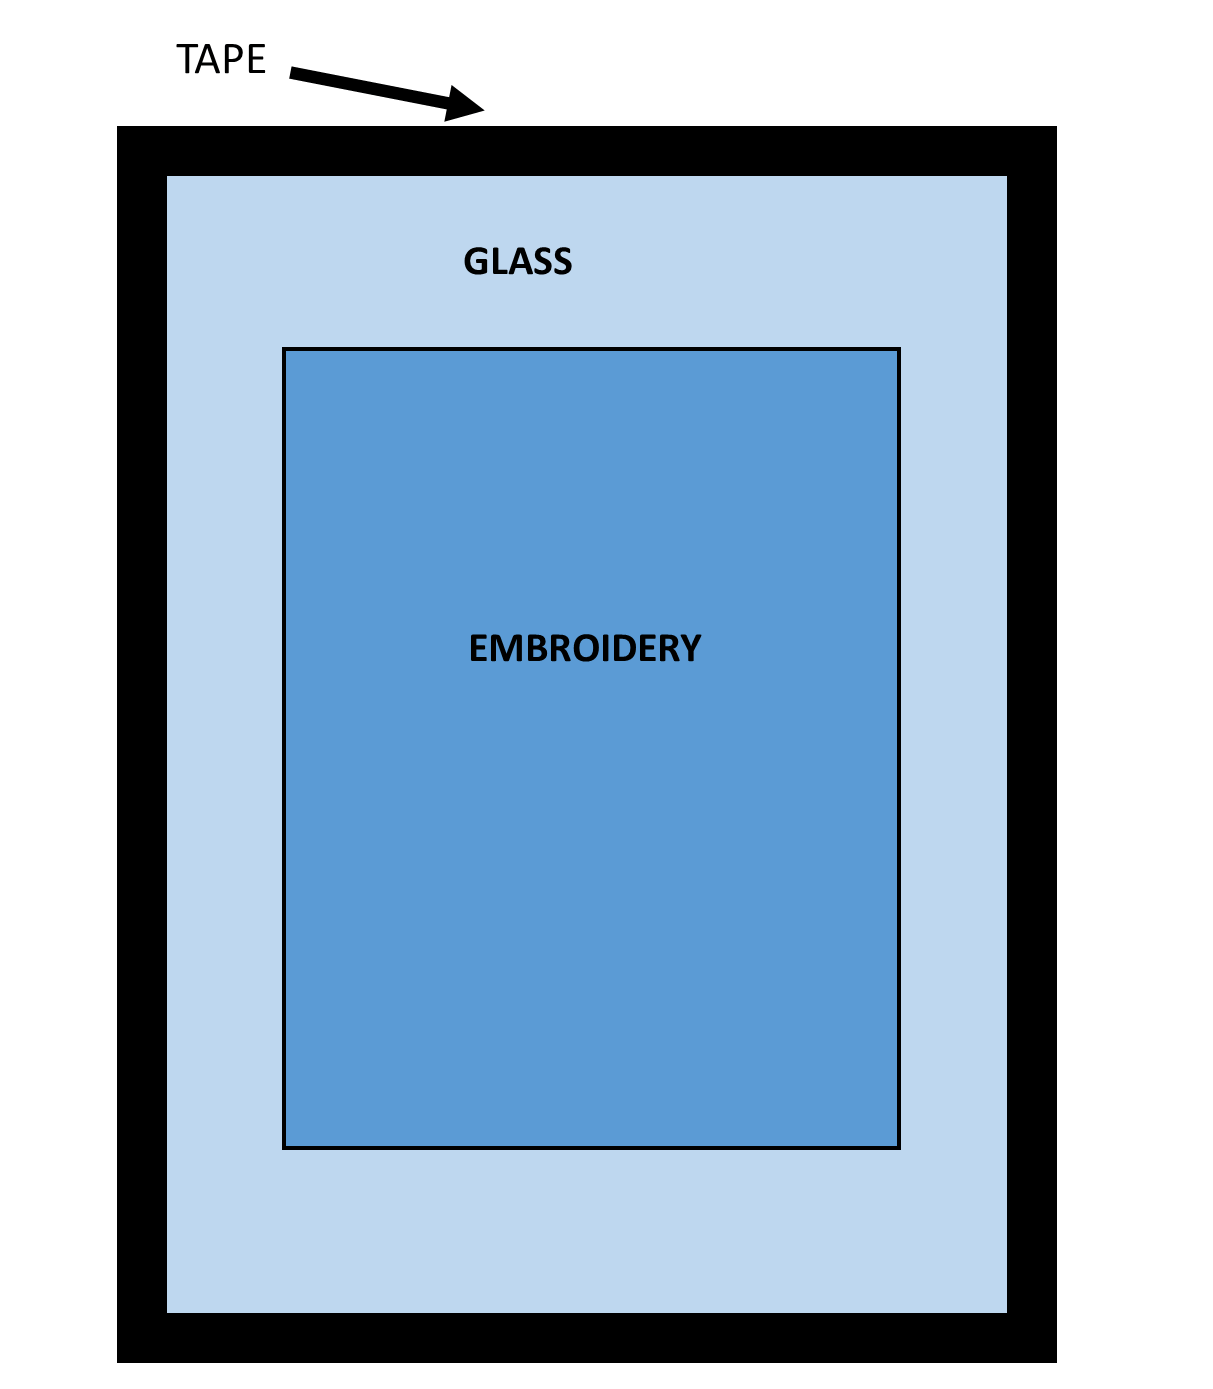
Clean the glass and lay your embroidery down. Place the other pane of glass on top and secure with scotch tape a piece on each side to temporarily hold. Work one side at a time using black or other color tape, tape lengthwise along each side, and remove your temporary scotch tape as you go. You can use a double-stick hanger on the “back” or display it on a stand.
Other Types Of Display Frames For Machine Embroidery
- Shadow boxes are perfect for 3D embroidery- they are available in many sizes and styles and come with instructions on how to assemble!
- Banners and Banner stands – You can create an inexpensive banner holder with a dowel and two wooden balls.
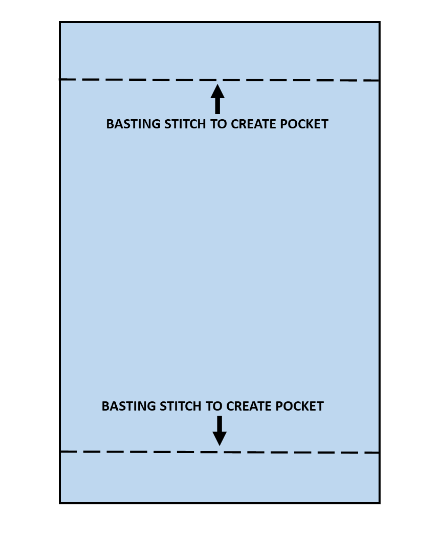
Simply sew a pocket on the top and bottom of your embroidered piece (make sure to finish the sides with a hem) and insert the dowel with decorative ends. The bottom dowel acts as a weight to keep the embroidery flat. Banner stands are also available for purchase online for smaller projects.
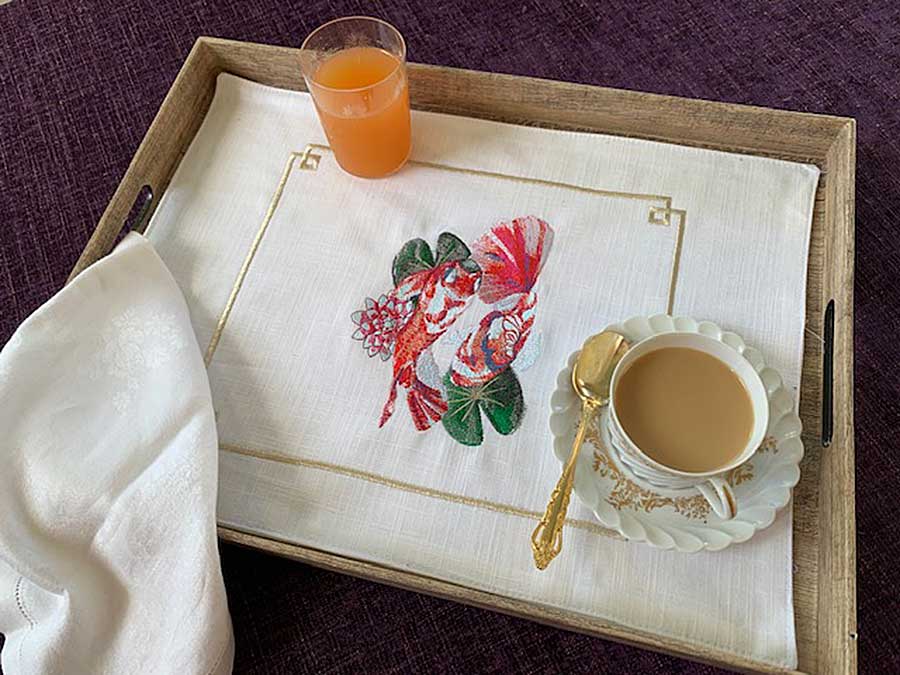
- Display Trays – These are SUPER simple to make! Place your embroidery on a serving tray available from a dollar or home goods store and use. To keep embroidery clean and safe, place a piece of Plexiglas or real glass over it to protect your work. These can be taken out and washed or changed with the seasons!
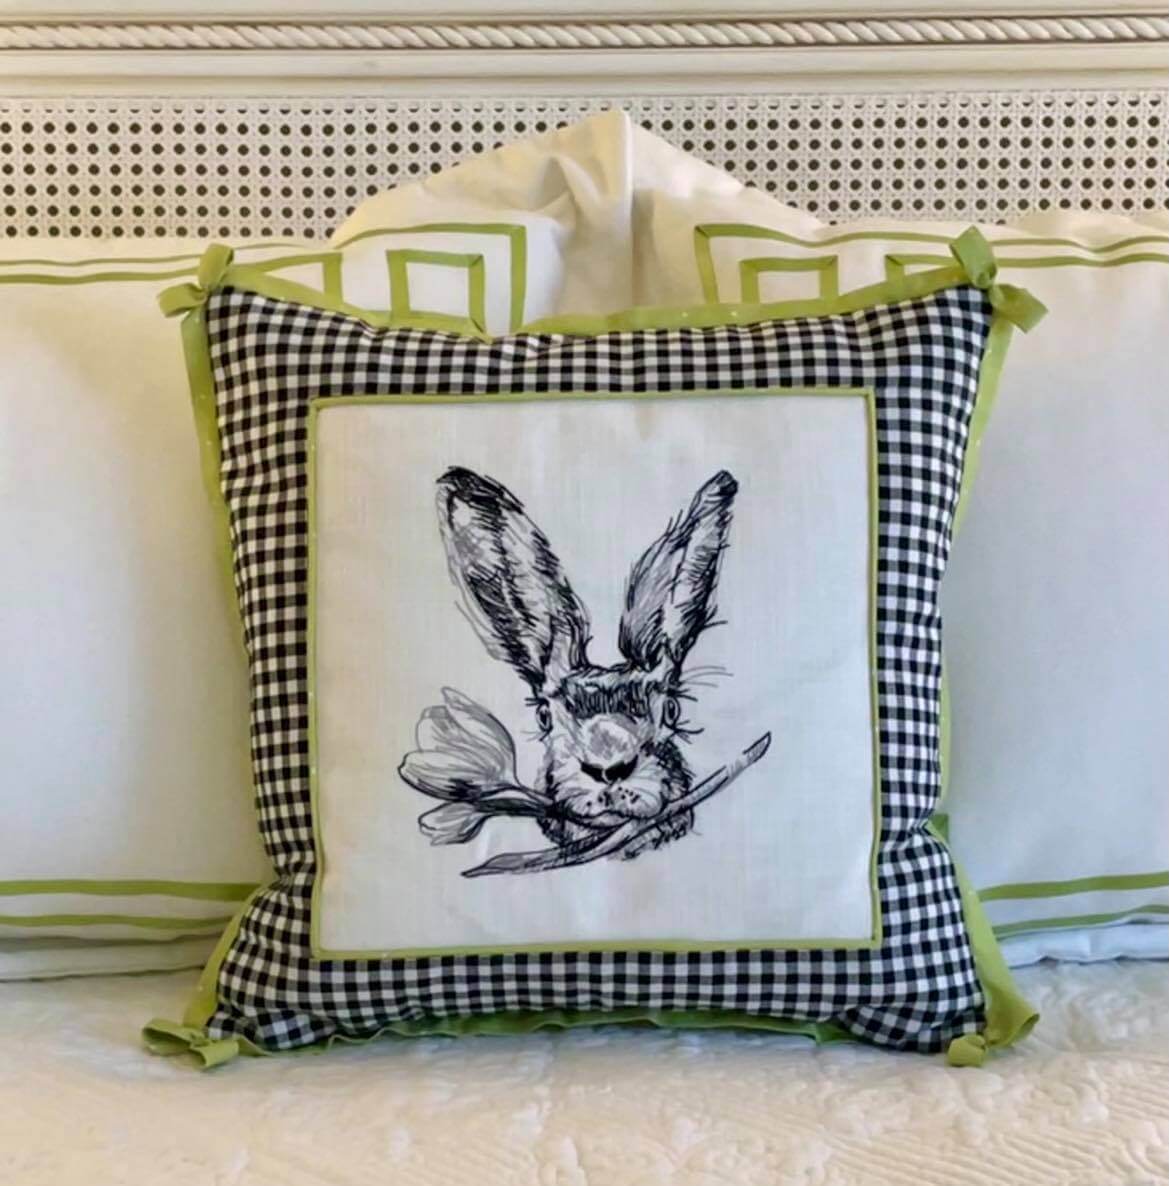
- Pillows – Who does not love a comfy pillow?! Why not make it even better with an embroidered design using soft and supple embroidery? Click here to learn how to embroider on a pillow.
- Gallery – Gallery displays feature artwork in all the same (or different) sized frames in a “collection” as in an art gallery.
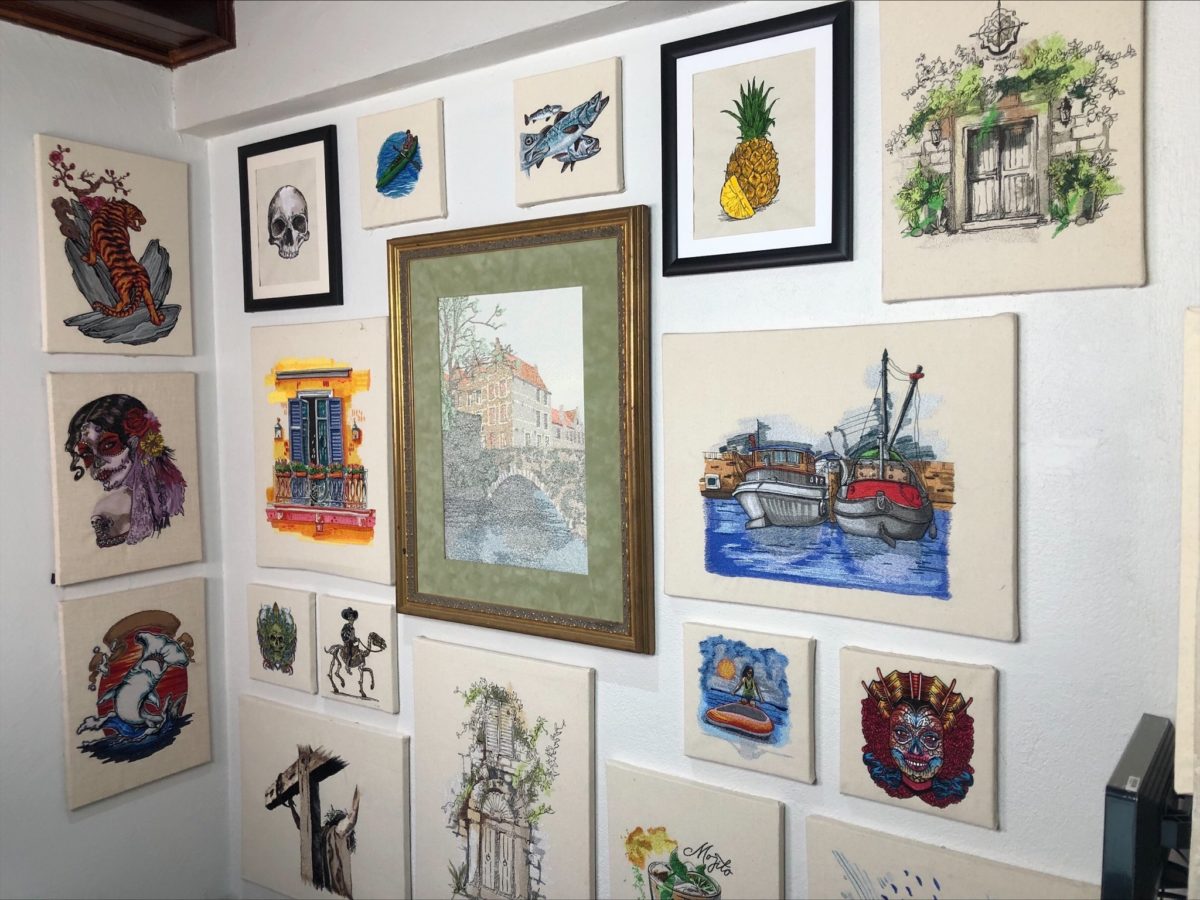
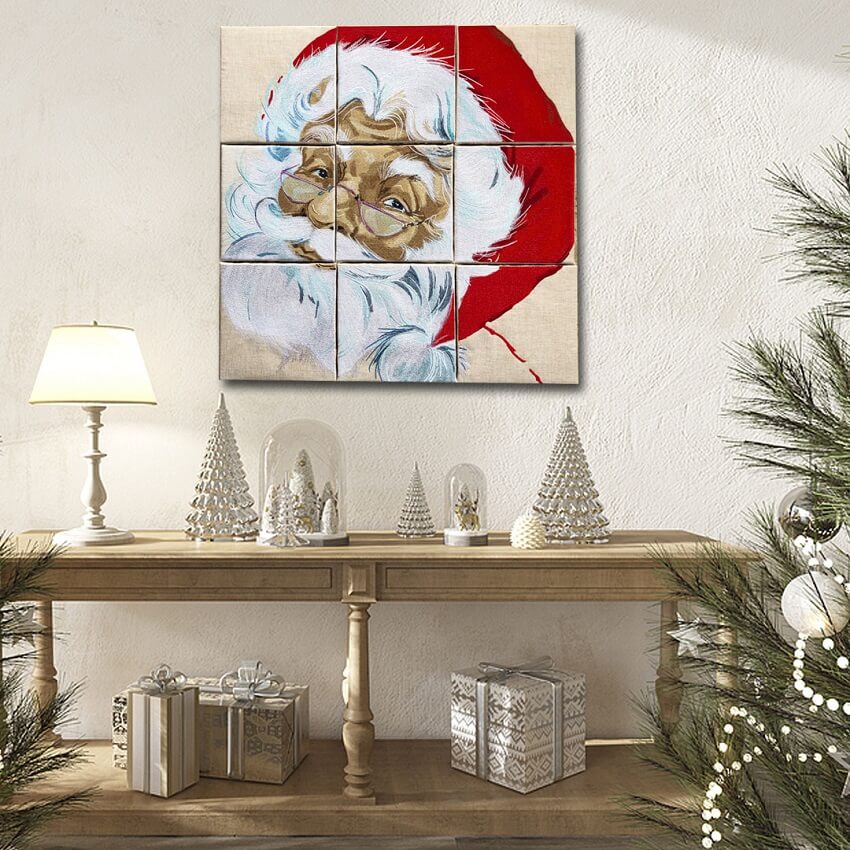
They can be scenes or photo stitches or one giant artwork broken into numerous individual tiles.
To create embroidered tiles, you can either mount them using a removable adhesive or use the outer frame of a canvas and staple your stitch out to it.
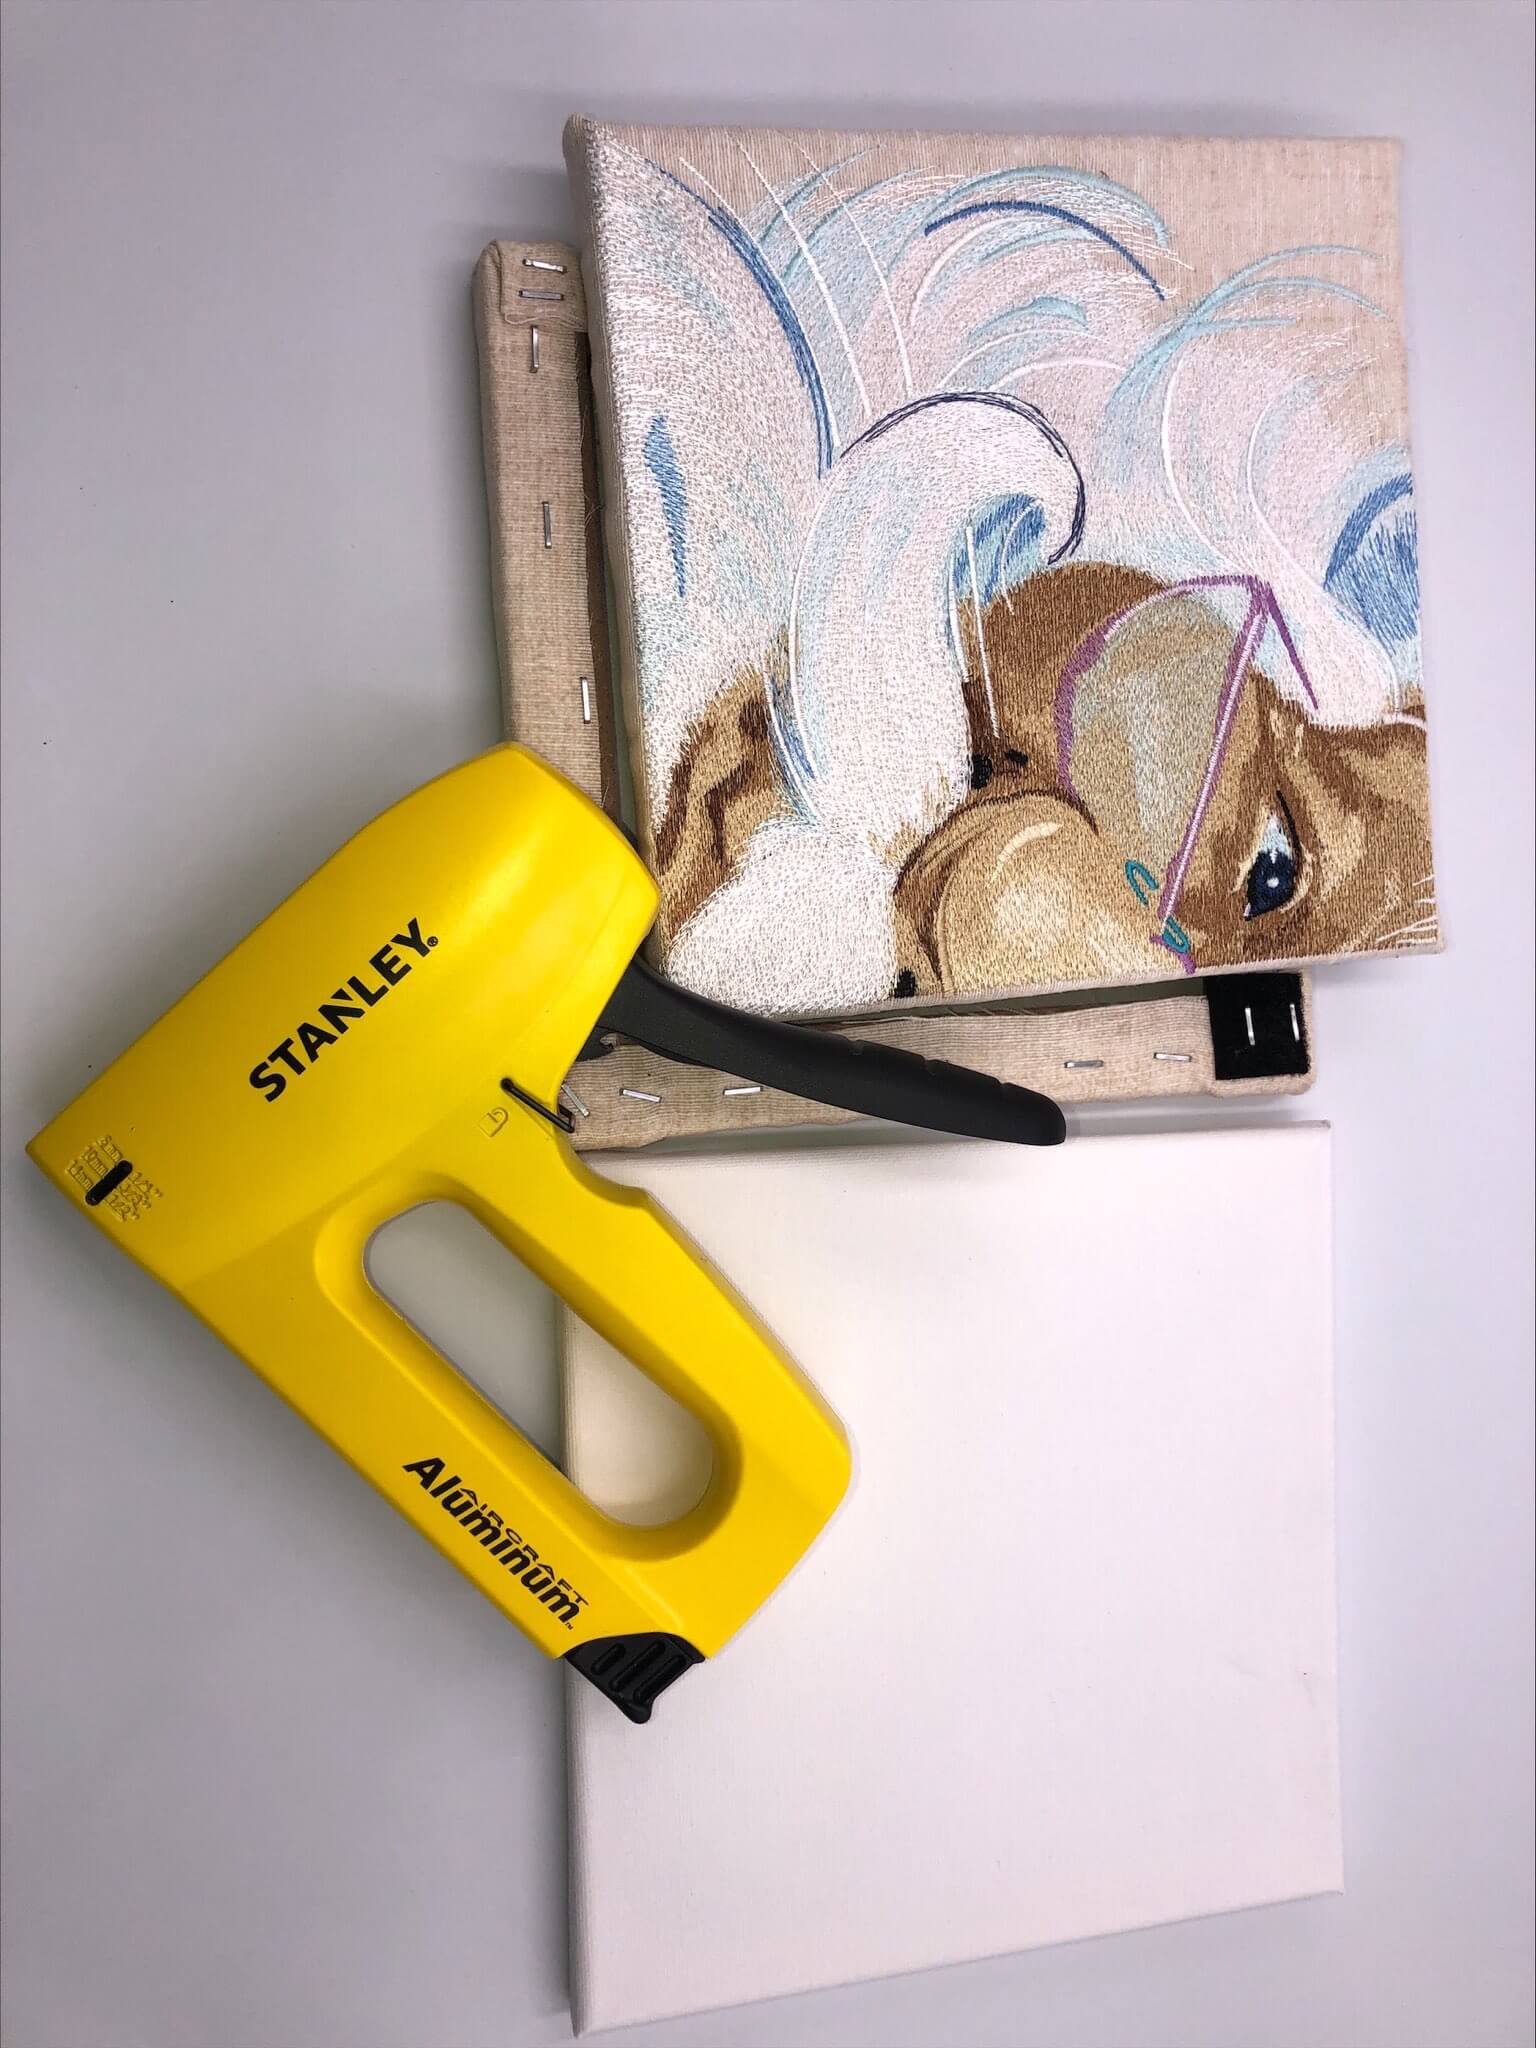
Interested in learning more about creating your own embroidery canvas frames? Watch the video below for a quick tutorial.
Considerations For Displaying Machine Embroidery
We’ve discussed so many options to display your creative work, but there are some key factors to keep in mind. After all, you’ve spent a lot of time preparing and stitching your embroidery, so you want to ensure it is safe, clean, and properly prepared.
- Sunlight – can damage almost anything! We suggest using U.V. protectant glass if you display your artwork in sunlight. The U.V. rays in sunlight can severely bleach rayon thread and alter the color of polyester threads, so try to keep your creations out of full sun.
- Dust – gets everywhere, and since embroidery is a fabric, it attracts dust. Keep your work clean and bright by vacuuming (with a clean vacuum brush, not one just off the garage floor) or compressed air. Keeping on top of this will keep your embroidery crisp and clean.
- Cleaning – you cannot clean embroidery in a traditional sense, but you can lightly brush with a very soft brush. Brushing with a stiff scrub or other brush can pull threads and cause fraying. Clean, dry, soft paint brushes work well. Never spray your work with directly spray cleaners, as these could affect your embroidery unless tested beforehand.
- Adhesives – as we touched on above, adhesives are permanent and can also discolor your fabric if used too heavily. Never spray the fabric; spray your backing, allow it to dry, and, if possible, test in an inconspicuous spot for stains or reactions.
Conclusion: Framing Is A Fun Way To Display Your Machine Embroidery
Cool ideas, huh? We have discussed some good starting points for displaying your embroidery. These can get your mind working, and you might mix, match or combine for even more inventive ways of display! Here are a few things to keep in mind.
- Think Creatively! Use your imagination, look online for creative ideas and try the ones detailed above. Remember that embroidery does not have to be flat on a shirt or just hanging in a frame on the wall.
- Consider your material type! Some materials like to be hung; others don’t like the sun, and the rest want to be touched and handled. Consider your material before you commit to a display method.
- Before committing to cut, adhere or make any changes to your embroidered stitch out, remember, “measure twice, cut once!”
P.S. Excited to try out some of these new ways to display your machine embroidery, but you have no idea what to embroider? Click here to check out nearly 30,000 high-quality embroidery designs to embellish your next project perfectly!

